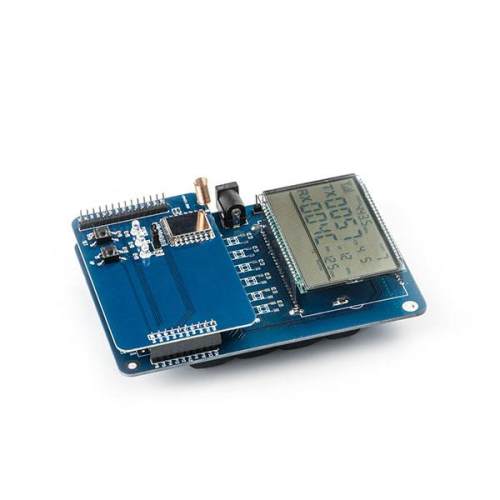
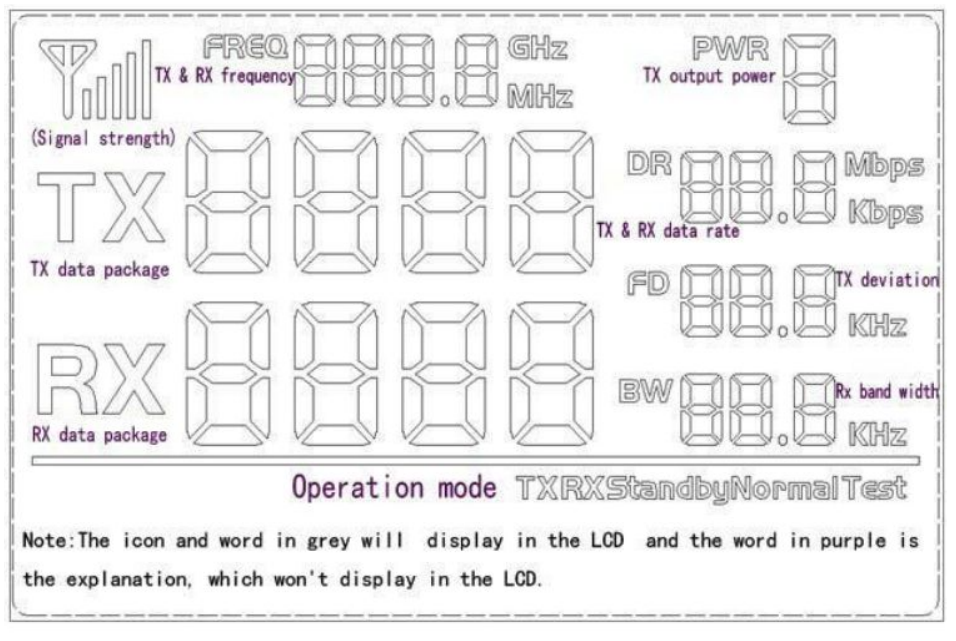
Working Mode of SX127X LoRa Module
There are 5 working modes in the DEMO. They are: Master mode, Slave mode, Tx Test mode, Rx test mode and Standby mode. Accordingly, they are displayed on the LCD as: Tx normal / Rx normal / Tx Test / Rx test / Standby. In Tx normal and Rx normal mode, the LoRa module works in Lora mode, the digital close to DR is Coding rate and the digital close to FD is the spreading factor; In Tx test and Rx test mode, the LoRa module works in FSK mode, the digital close to DR is data rate and the digital close to FD is frequency deviation.
In Tx normal and Rx normal mode, when one packet is transmitted, the Red LED will reverse, the number of Tx packets will increase; when one packet is received, the Blue LED will reverse, the number of Rx packets will increase.
1) Master Mode: Send 1 packet per second, and waiting for the acknowledge.
2) Slave Mode: Stay in Rx mode to wait for the data from the master, it will send back the acknowledged signal after received the data from the master.
3) Tx Test Mode: RF module continuously transmit signal.
4) Rx Test Mode: RF module is always in Rx mode.
5) Standby Mode: RF module is always in standby state.
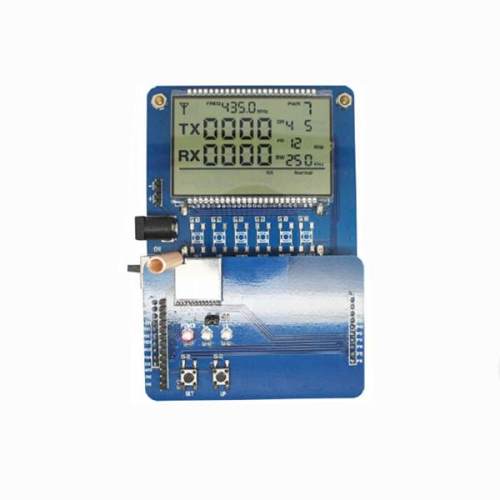
Button Operation of SX127X LoRa Module
1) [SET] Button
Press the [SET] button to enter setting mode if not in setting mode. In setting mode,press[SET]button to toggle between the set parameters: working mode /frequency/ output power / data rate / spreading factor/ Bandwidth. The related LCD ICON will flash to indicate.
2) [UP] Button
In setting mode, press the [UP] button to increase the value of flash icon.
Operation of SX127X LoRa Module
Press [set] button into setting mode, press [up]button to change the flashing working mode (TX Normal, RX Normal, TX test, RX test, standby)
Press [set] button to change frequency, press [up] button to change the value , and press [ Set ] button to turn to next digital .Frequency range is:400MHz-510MHz
Press [set] button, the digital close to PWR start to flash, press [up]button to change the value of output power (from 0-7)
Press [set] button, the digital close to DR start to flash ,press [up]button to change the vale of coding rate (4/5,4/6,4/7,4/8 )
Press [set] button, the digital close to FD start to flash,press [up]button to change Spreading Factor (6-12)
Press [set] button, the digital close to BW start to flash, press [up]button to change baud width (62.5kHz,125kHz,250kHz,500kHz)
Note: The DEMO board has FLASH memory inside, all the setting parameters will be saved automatically and keep unchanged even power-off.