
Contact Us
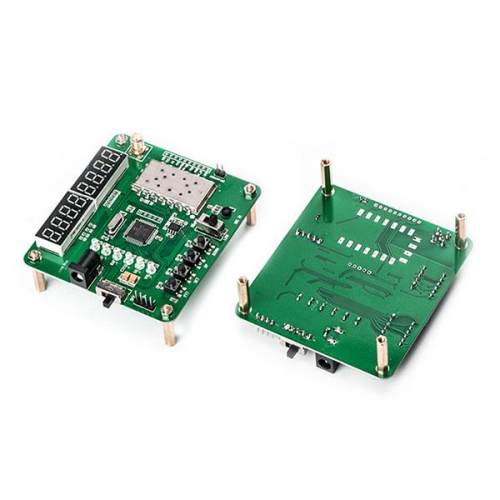
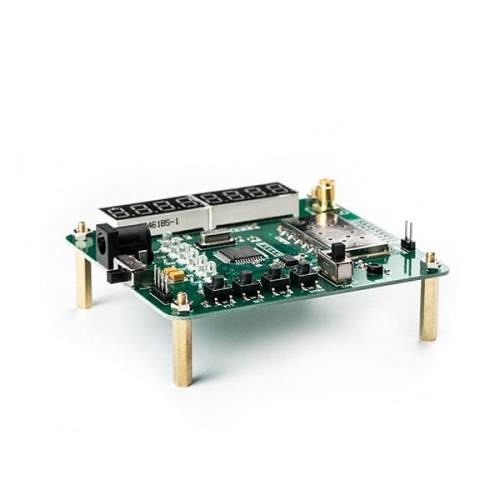
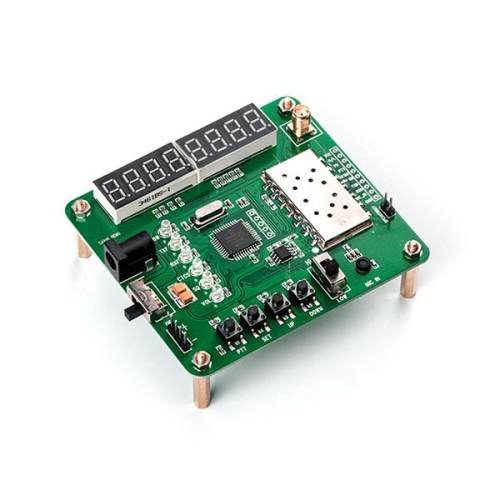
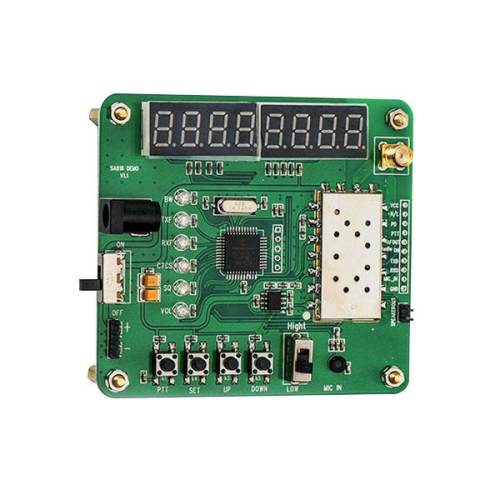
SA818S : Demo Board Walkie Talkie Module
Users can use the Demo board to set the parameters of the walkie talkie module SA818S such as working mode /frequency /transmitter power / transmission data rate through the buttons, and measure the wireless communication distance.
Download
Key operation of Walkie Talkie Module SA818S
1 Key SET
Press it to setting mode, the data on LED nixie tube will be flickering, you can change it by key UP or DOWN; Press key SET again, the item flickering will shift. If the item flickering is the last one, it will quit setting mode.
2 Key UP
When in setting mode, pressing key UP will increase the flickering value.
3 Key DOWN
When in setting mode, pressing key DOWN will decrease the flickering value. Otherwise it will move down the light LED.
4 Key PTT
Pressing it will make the module into sending mode, when loosen the module into receiving mode.
5 Dial Switch
When sending mode, switch to HIGH will send with high power, switch to LOW will send with low power.
6 Set TX frequency
After power on, the LED close to “TXF” is on, indicates that LED nixie tube is displaying TX frequency. Press key SET, the highest order of frequency will flicker, and can be changed by key UP or DOWN. Press key SET to set the next order.
7 Set bandwidth
Press key DOWN, the LED close to “BW” is on, indicates that LED nixie tube is displaying bandwidth, pressing key SET to setting mode and press key DOWN to change bandwidth.
8 Set RX subaudio
Press key DOWN, the two LEDS close to “RXF” and “CTCS” are light up, it indicates that LED nixie tube is displaying receiving subaudio. Press key SET to change receiving subaudio. If the LED nixie tube display “00”, it means that no subaudio in receiving mode. If display “tcs”, it means that receiving subaudio is analog, and if display “cds”, it means that receiving subaudio is digital.
9 Set volume
Press key DOWN, the LED close to “VOL” is on, press key SET to setting mode, and can be changed by key UP or DOWN.
10 Set SQ
Press key DOWN, the LED close to “SQ” is on, press key SET to setting mode, and can be changed by key UP or DOWN.
11 Set TX subaudio
Press key DOWN, the two LEDS close “TXF” and “CTCS” are on, indicates that LED nixie tube is displaying sending subaudio. Press key SET to change sending subaudio. If the LED nixie tube display “00”, it means that no subaudio in sending mode. If display “tcs”, it means that sending subaudio is analog, and if display “cds”, it means that sending subaudio is digital.
12 Set RX frequency
Press key DOWN, the LED close to “RXF” is on, indicates that LED nixie tube is displaying RX frequency. Press key SET, the highest order of frequency will flickering, and can be changed by key UP or DOWN.
13 Press key SET to set the next order
Press key UP, it will start to scan frequency and subaudio, the frequency displayed on the LED nixie tube will increase quickly and check the module whether receive the frequency and the subaudio, it will stop when there is any signal or press key DOWN.